 RSS Feed


 April 26th, 2021
  Awake Goy
 Throughout history, grand battles were often deemed necessary when ambitious nations were forming. They served as a crucible on which an identity of a people was forged and preserved. The history of both England and Scotland is filled with countless battles, standing as a testament to their tenacity and will for independence. The grandiose Battle of Flodden, fought in 1513, pitted these two nations against one another, and was one of their principal engagements, especially due to the fact that it claimed the life of a king.
Centuries of Rivalry: Prelude to the Battle of Flodden
Let’s face it: England and Scotland have shared a pretty rancorous history. No use dawdling or trying to evade that fact. Their saga has been filled with rivalry, war, battles for independence , and attempts at conquest. But, hey – such is history! Both nations suffered greatly over several centuries of almost constant conflicts and warfare with one another. Borders didn’t change very much over this time and tempers flared up easily. But it was the people that suffered the most, as is always the case with two nations at war. A solution to this situation was in desperate need.
Centuries of conflict were brought to an end in 1502, when the so-called Treaty of Perpetual Peace was signed. Henry VII of England and James IV of Scotland were eager to sign the treaty, as their kingdoms had been in a state of war for the past two centuries and beyond. Alas, signing the treaty didn’t make these problems disappear and intermittent conflicts continued afterwards and raids across the Scottish Borders continued in earnest. Naval competition between the two nations persisted causing the death of a noted Scottish sailor, Sir Andrew Barton.
What is more, a new English king came to the throne in 1509, Henry VIII, who espoused a highly hostile rhetoric, continuing to claim that he was the overlord of Scotland. Thus far, the treaty had been of no use whatsoever. In this vitriolic environment, finding a justification for war wasn’t hard and James IV, King of the Scots, declared war on England under the pretense of helping France. By doing this, he was honoring a very old alliance between Scotland and France, dating to 1295 and known as the Auld Alliance. James IV’s aim was to divert England’s efforts from their campaigns against the French.
At the time, Europe was embroiled in a difficult and widespread conflict known as the War of the Holy League, which ran from 1508 to 1516, and was just a facet of the larger Italian Wars that lasted from 1494 to 1559, a conflict that involved the major European powers. England was on the side of the Catholic League, fighting to protect the Pope from the French. Scottish involvement as an ally of the French, while many other Papal nations were on the opposing side, generating the wrath of the Pope. Due to his alliance with the French, James IV was excommunicated on 28 June 1513.
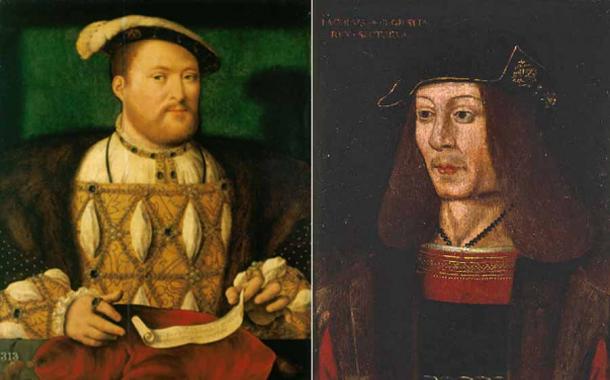
Before all out war, there was a heated exchange of letters between Henry VIII (left) and James IV of Scotland (right). ( Public domain / Public domain )
Scotland v’s England: The Heated Conflict Begins
By that point, the conflict was once more in full swing. James IV roused up his Scottish navy, sending a host of ships, some 22 vessels, to join up with the massive French fleet. The Scottish fleet was under the command of James Hamilton, the 1st Earl of Arran, but was sadly much delayed. Its intention was to ultimately cut off the English line of communications across the English Channel. In the end, after severe delays, the Scottish fleet played no part in the ensuing conflict. However, James IV made the mistake of placing his seasoned artillery veterans on these ships, essentially hampering his own war efforts on the land.
A heated exchange of letters between the two kings followed. Henry VIII was enraged by the simple fact that Scotland had allied itself with the French, and claimed that James ought to be an English ally, especially considering the fact that Henry’s sister, Margaret Tudor , was married to him. James, on the other hand, maintained the position that Henry should at once abandon his efforts in France. Needless to say, neither King was willing to back down. War was imminent.
James IV was the first to make a move. Finding a pretext – chiefly the murder of a Scottish Warden named Robert Kerr – James crossed over into England at the head of a vast army of 30,000 men. Of course, this invasion was expected by the English. Henry VIII had made great efforts to fortify the northern part of his realm, positioning troops and artillery along the northern border, and the Earl of Surrey, Thomas Howard, had been appointed as the Lieutenant-General of the Army of the North. The English were ready – come one, come all!
Print showing border reivers, who crossed the border to pillage those on the other side. ( Public domain )
The Ill-Fated Raiding Party
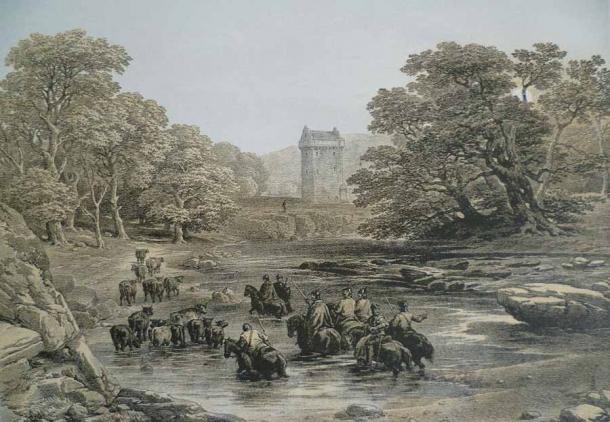
Border raiding has a long history in Scotland. Border reivers crossed over – both on the Scottish and English side – and pillaged the local folk. In times of war, border reivers were a handy asset, and James IV sought to utilize them to their fullest extent in 1513. On August 5th, he sent a force of roughly 7,000 border reivers, under the command of Lord Alexander Home, into Northumberland, where they began to pillage everything in sight. Such a raid was a simple and efficient way of gaining precious war booty – if done properly.
However, the Scottish raid of 1513 was an ill-fated endeavor. The English managed to respond rapidly, due to the diligence of the Earl of Surrey, sending a force of roughly 1,000 men as a countermeasure. Of these, around 600 were experienced mounted archers. The English force lay in a perfectly arranged ambush and surprised the Scottish raiding party with a devastating volley attack. What ensued was a chaotic slaughter. The Scots fled in panic, leaving 600 of their men dead on the ground. All the war booty they captured was also left behind, rendering the entire raid useless. Ever since, it has been called the “Ill Raid”.
In the end, both armies had plenty of time and advance notice to prepare for a battle that was surely looming on the horizon. In the classic spirit of medieval chivalry , James IV announced his intent to invade directly to the English, one month in advance. This gave his enemy plenty of time to prepare. These chivalrous practices can be seen as a major flaw of warfare during this period. By late August, James crossed over the River Tweed and into England, at the head of a sizable army of 42,000 men.
In the initial days of his campaign, James managed to capture several castles with relative ease: castles Ford, Etal, Wark on Tweed, and Norham all fell to the Scots. By early September, with the English hastily assembling their forces to counter the Scots, the English had sent a herald to James IV to appoint a place for the battle. At the time, Henry VIII was away in France, and his wife Catherine of Aragon had been left as Governor of the Realm and Captain-General to manage the crisis. While she was on her way north for battle, the clash, which was by now a forgone conclusion, took place without her.
Preparing for the Clash: Battle at Flodden Hill
James IV was no fool. He nestled his army in a specifically chosen position where they would certainly have an upper hand. He selected Flodden Hill – near Branxton – and arranged his men and cannons there. The hill was a commanding feature of the surrounding landscape. It gave him a clear advantage, since the enemy had to advance uphill. He also utilized the remnants of an ancient hill fort , and reinforced it with additional ramparts as well. All in all, the Scots were positioned ideally and they had the advantage they needed.
On the opposite side of the conflict, the Earl of Surrey, Thomas Howard, was in a difficult position. Due to their favorable position, to attack the Scots would be suicide. His army numbered around 26,000 men, nearly half the size of the Scottish army, and was in dire need of supplies. Then again, if he chose not to attack, he risked shame and the inevitable anger of King Henry VIII. What was he to do in such a difficult situation?
Howard attempted to challenge James’ choice of strategic location. He sent his herald to James and asked that they meet at the Milfield Plain as originally agreed. However, this site was ideal for an ambush, apart from being the setting for the preceding Scottish Ill Raid. Knowing this, James IV had no intention to fight at that location, and was not willing to leave his superb and fortified position at Flodden Hill. To the challenge that Howard had sent him, he simply replied that it was “not fitting for an Earl to seek to command a King.”
The Battle of Flodden has gone down in history due to England’s defeat of the Scots. ( Public domain )
Dirty Tricks of the Border Reivers Turn the Tables
Thomas Howard was now in a terrible position. He had to face the Scots. To wait in position was out of the question, as maintaining his army was highly costly. What is more, the convoy with food that was arriving to supply them was looted on the way, by Englishmen nonetheless! Nevertheless, even when facing such difficult odds, a solution always appears. The Earl of Surrey found a way out from this situation thanks to the ingenious advice of one John “the Bastard” Heron.
John Heron was a notorious member of the Clan Heron, a clan of border reivers remembered in both English and Scottish history. The family owned many castles over the centuries and enjoyed considerable power. Even so, they were noted as a “hot tempered race, regularly in trouble with the authorities,” and they made their fortune by rustling cattle and raiding. But playing dirty tricks was a sure way for the English to evade the sure failure of this difficult situation, so the Earl of Surrey was quick to listen to the mischievous plan.
Instead of facing the Scots directly on Flodden Hill – and risking complete destruction – the English instead took an eastern winding route, following the old Roman causeway. By winding their way, the English aimed to outflank the Scottish army, or to hopefully attack them from the rear by reaching Branxton Hill, just 2 miles (3.2 km) from the Scottish positions. The maneuver was successful, and the English were reaching a favorable position to flank. Of course, their movements were noticed by the Scottish scouts, and James IV was quick to respond, moving his army to Branxton Hill in order to remedy the situation. While this hill was still a favorable position for the Scots, they hadn’t explored the layout sufficiently.
Unexpected Wetland Creates a Decisive Turning Point During Battle
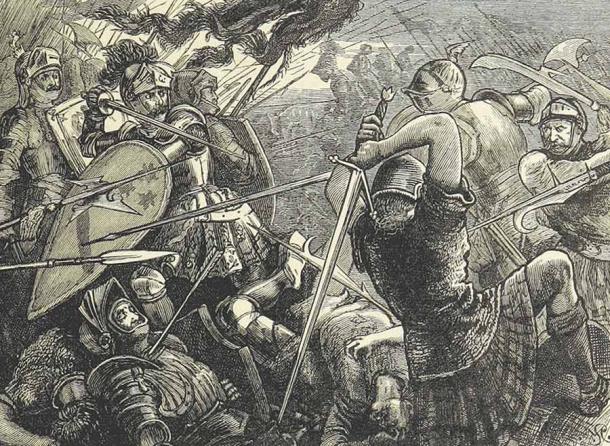
The time for battle finally arrived. Newly positioned on the light slopes of Branxton Hill, James IV and his Scottish army faced the English. Lord Home advanced with the Scottish left flank and opened the battle with the first clash, managing to win against the English detachment commanded by Edmund Howard. Seeing this initial success by his heavy troops, James ordered the next battle formation – this time the central one – to move forward down the Branxton Hill and to engage the enemy.
However, here is where the Scots ran into trouble. Confident and well-arranged, they now encountered a major obstacle. At the foot of the hill was an area of somewhat concealed marshy ground, an underground seepage zone that was now swelling after days of heavy rain. Looking across the horizon, one can easily miss this feature. But now the Scots were struggling to cross it, losing cohesion and breaking rank. The heavy pikemen needed the momentum of rapid downhill advance in order to inflict high damage, but now it was lost as they struggled with the boggy, mushy land.
The English in the meantime advanced in response and were now engaging in savage hand to hand combat with the confused Scottish pikemen. Seeing the clash developing, James IV himself rode out with a detachment to enter the fray – it is unknown whether he knew of the marshland obstacle at the foot of the hill. The battle that ensued was fierce, bloody, and downright savage. The English followed a policy of “no prisoners”, which caused a high rate of casualties amongst their opponents. The Englishmen won a decisive victory after a quick and ruthless engagement.
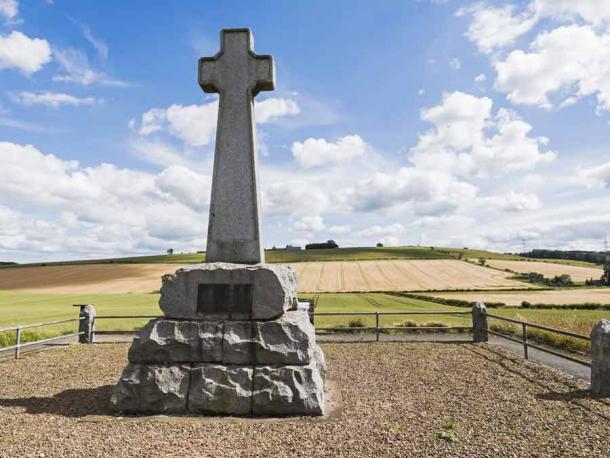
Monument to the Battle of Flodden Field at Branxton ( joe888 / Adobe Stock)
The King Lay Dead Amongst the Flowers of the Forest
The Scottish King James IV was killed in the final stages of the battle, which took place on 9 September 1513. He always took risks, and the Battle of Flodden was no exception. After the battle, his body was discovered amongst the dead, surrounded by the corpses of his personal bodyguard, the so-called Flowers of the Forest. The King suffered two arrow wounds, one of them in the jaw, and sword wounds to the neck and wrist. He was the last monarch to die in battle in the British Isles.
The Battle of Flodden was a terrible defeat for the Scots. A huge number of Scottish nobles and aristocrats died in the battle alongside their King, who was criticized posthumously for moving downhill to attack. For Catherine of Aragon, Flodden was an astounding victory. Along with the bloody coat of the dead Scottish king, she sent a letter to Henry VIII, stating: “I thought to send himself unto you, but our Englishmen’s hearts would not suffer it.” In any case, this conflict serves as a good reminder that numerical superiority is not always the most consequential aspect for achieving victory. Sometimes you have to search for alternative strategies, looking for new paths in order to secure victory. And that is exactly what the Earl of Surrey, Thomas Howard, did.
Top image: This painting depicts news of the Battle of Flodden when it reached Edinburgh. Source: Public domain
By Aleksa Vučković
References
Goodwin, G. 2013. Fatal Rivalry: Flodden, 1513: Henry VIII and James IV and the Decisive Battle for Renaissance Britain. W. W. Norton & Company.
Jones, R. 1869. The Battle of Flodden Field, fought Sept. 9, 1513. John Menzies & Co.
Sadler, J. 2006. Flodden 1513: Scotland’s Greatest Defeat. Osprey Publishing.
 Posted in
  Tags:
Tags: 


